No page builder is perfect — and I won’t pretend like the block editor is.
But in talking with folks using blocks, I’ve found a few little tricks that not everyone seems to realize are there.
In this video, I’m going to share with you 5 ways to improve the block editor experience that will improve your workflow, eliminate the need for plugins you might be using, and make your builds a little more enjoyable.
With that, let’s dive in!
Hide blocks you don’t want to use
First up I want to address this crazy number of blocks that come with WordPress core — the vast majority of which I’ve never even touched.
When adding a new block, the search function works great — but there’s no reason to have to sift through dozens of blocks you’re never going to use.
Did you know that you can simply hide them away?
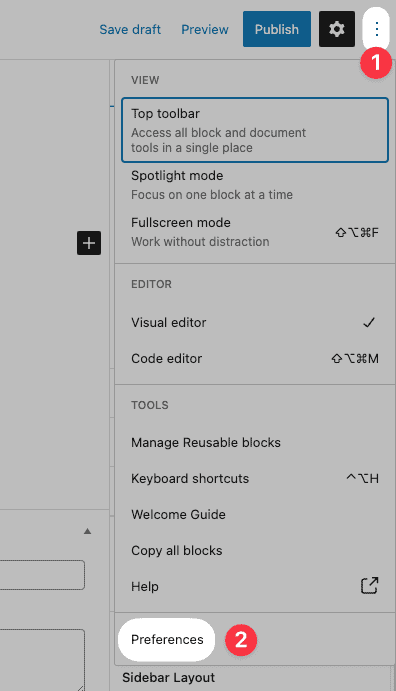
To show and hide blocks, click the kebab menu in the top right corner and select “Preferences”.
From the modal, choose the “Blocks” tab, and simply uncheck all the blocks you don’t intend on using.
This works with both the native WordPress blocks, as well as any third-party block packages you’ve installed.
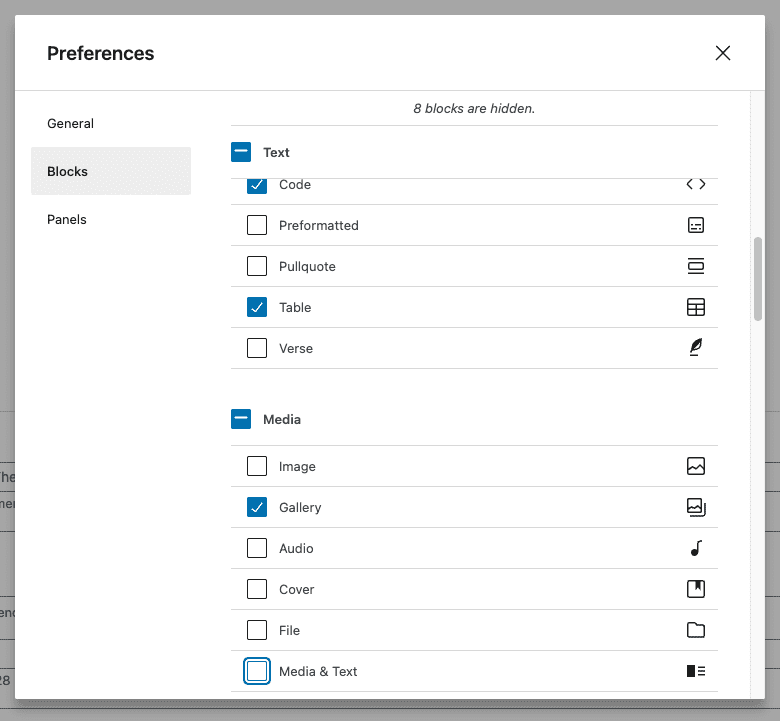
Once you’ve made your selections, just close the popup (you don’t have to save anything), and all the blocks you unchecked will not be shown in the block inserter again.
Not only does this declutter the block editor, but it will keep your clients from selecting random blocks and making a mess of all your hard work.
It’s important to know that this doesn’t get rid of the blocks, only hides them. You can go back into the same menu and select a block to unhide it at any time.
Memorize your keyboard shortcuts
Keyboard shortcuts are an important part of being efficient in any software — and the block editor is no different.
But, when I watch people use the block editor, I see them opening menus and making tons of clicks unnecessarily.
There are 3 keyboard shortcuts in particular that save me the most time.
Duplicate
If you have a block selected and want to duplicate it, instead of pressing the kebab menu and pressing duplicate, you can hit Ctrl+Shift+D (or ⇧⌘D if you’re on a Mac).
Delete
To delete a block, simply hit Shift+Alt+Z on a PC, or ⌃⌥Z on a Mac.
Insert a New Block
To quickly add a new block to the page, press Enter to start a new line, type a forward slash, and start typing in the name of the block you want to add. Your search will filter down as you type, and once you have the right block selected, just hit enter to insert it.
That sounds like a lot, but you can do this so much faster than clicking the block inserter button once you get the hang of it.
View all block editor keyboard shortcuts
Add reusable blocks to the sidebar
Reusable blocks are a highly-underrated feature of the block editor — but the problem is, they are out of sight, out of mind.
Too often I simply forget to use them.
One great little trick to get into a better habit of using reusable blocks is to add them to the WordPress Admin Menu.
To do that, simply add this script to your child theme’s function.php file or add via a snippets plugin (like CodeSnippets):
/* Reusable Blocks accessible in backend */
function be_reusable_blocks_admin_menu() {
    add_menu_page( 'Reusable Blocks', 'Reusable Blocks', 'edit_posts', 'edit.php?post_type=wp_block', '', 'dashicons-editor-table', 22 );
}
add_action( 'admin_menu', 'be_reusable_blocks_admin_menu' );
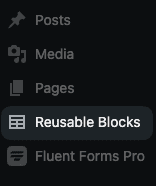
With that snippet in place, you’ll see a new menu item appear just below “Pages” inside your menu.
Duplicate Pages
I find myself wanting to duplicate an existing page as a starting point for a new page pretty regularly. For years I’ve used a plugin for this exact functionality.
While the built-in solution in the block editor isn’t quite as simple as hitting “duplicate” from your list of pages or posts — it will save you from having to install and maintain yet another plugin.
To use the built-in solution, open the page or post you want to duplicate, click the kebab menu in the top right corner of the editor and click “copy all blocks”.
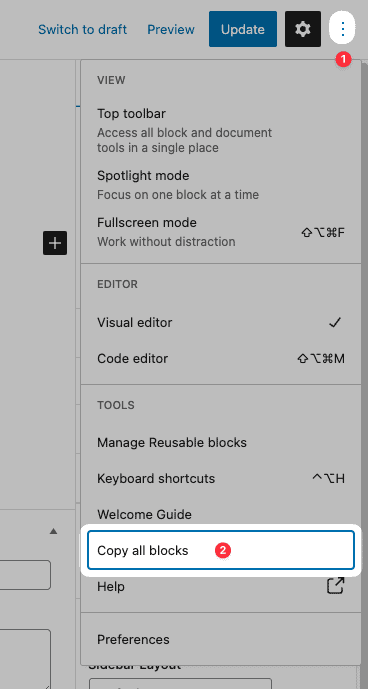
Now, all the blocks from that page are copied to your clipboard, and you can go to your new page or post and paste them in.
Edit as HTML
Last on the list is the ability to edit the HTML of any of your blocks.
This isn’t one I use quite as often, but there are cases where this comes in extremely handy.
To edit a block as HTML, select your block, click the kebab menu, and select “Edit as HTML”.
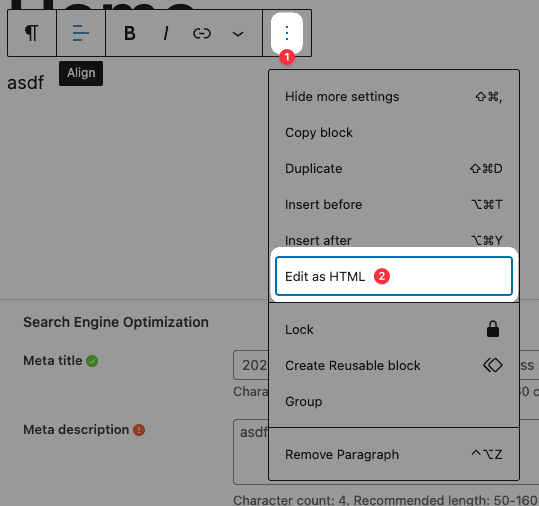
This will immediately transform your block from the visual editing experience you’re used to, to raw HTML.
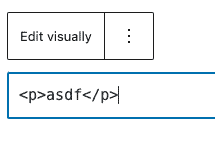
One way I find myself using this often is to create a span tag within a block of text. This gives you the ability to easily add a class to just a portion of your text and style it independently of the rest of the block.
But you can add any HTML you want to the block giving you unlimited possibilities!
Tip: It’s pretty easy to screw something up when editing the HTML, so I would recommend getting in the habit of either duplicating the block you’re going to edit or copy it to your clipboard before you edit as HTML so you can start over if something goes wrong.
