Even if you’ve only built a hand full of client websites, you’ve realized how many times you end up repeating yourself across the website.
Take, for example, a phone number.
You’ll likely put it in the footer, on the contact page, in the privacy policy, and maybe even in calls to action across multiple pages of the website.
So what happens when the client has to change their phone number?
If you put the phone number in statically to all of these places, then get comfortable — you have a lot of things to manually go through and replace one-by-one.
Thankfully, there’s a better option.
It’s called Options Pages, and it’s a feature of Advanced Custom Fields Pro.
With options pages, you can create a centralized dashboard to store repeated information (things like names, phone numbers, emails, addresses, even social media links). You can then reference these dynamic fields across your website.

If, for whatever reason, this information ever needs to change, you change it on your options page and it will automatically update everywhere you’ve referenced it across your website.
Talk about a time-saver! It’s one of those tricks that you’ll never want to do it any other way once you learn it.
This is a huge deal when it comes to scalability and maintainability — not to mention ease of use.
However, us GenerateBlocks (or “GB”) users have never been able to take advantage of this feature since there is no direct integration between GB and ACF Option Pages.
Until now…
Thanks to our favorite snippet creator, Taylor Drayson, we can now use a simple and intuitive Template Tag system to use ACF Option Pages with GenerateBlocks (or any block-based system).
You’ll need to join Taylor’s Snippet Club or purchase the snippet of code for a one-time fee of $20, and then we can get started…
Implement The Template Tag System
Thankfully, this system is dead simple, and won’t require you to make any tweaks or customizations to the code to get it working — which makes it a simple copy & paste solution.
Once you’ve purchased Taylor’s snippet, you’ll need to copy it to your clipboard.
From there, you can install it on your website in 1 of 2 ways…
Child Theme’s Functions.php file (preferred)
If you’re using a child theme, then you can add the code snippet to your functions.php file. Keep in mind, you have to be using a child theme for this method to work (otherwise a theme update will overwrite your work).
Snippet plugin
If you’re not using a child theme, you can use a snippet plugin like Code Snippets. Simply install and activate the code snippets plugin, add a new snippet, and paste in Taylor’s Template Tag system.
Some people take exception to this method as saving code inside of your database could cause a security issue.
Create Your Options Page
To create your options page, you’ll need a copy of Advanced Custom Fields Pro (the paid version of ACF is required to get the Options Page functionality).
Once you’ve installed and activated ACF Pro on your website, use the following process to set up your first, basic, Options Page:
1. Click on Options Pages

2. Click on Add New

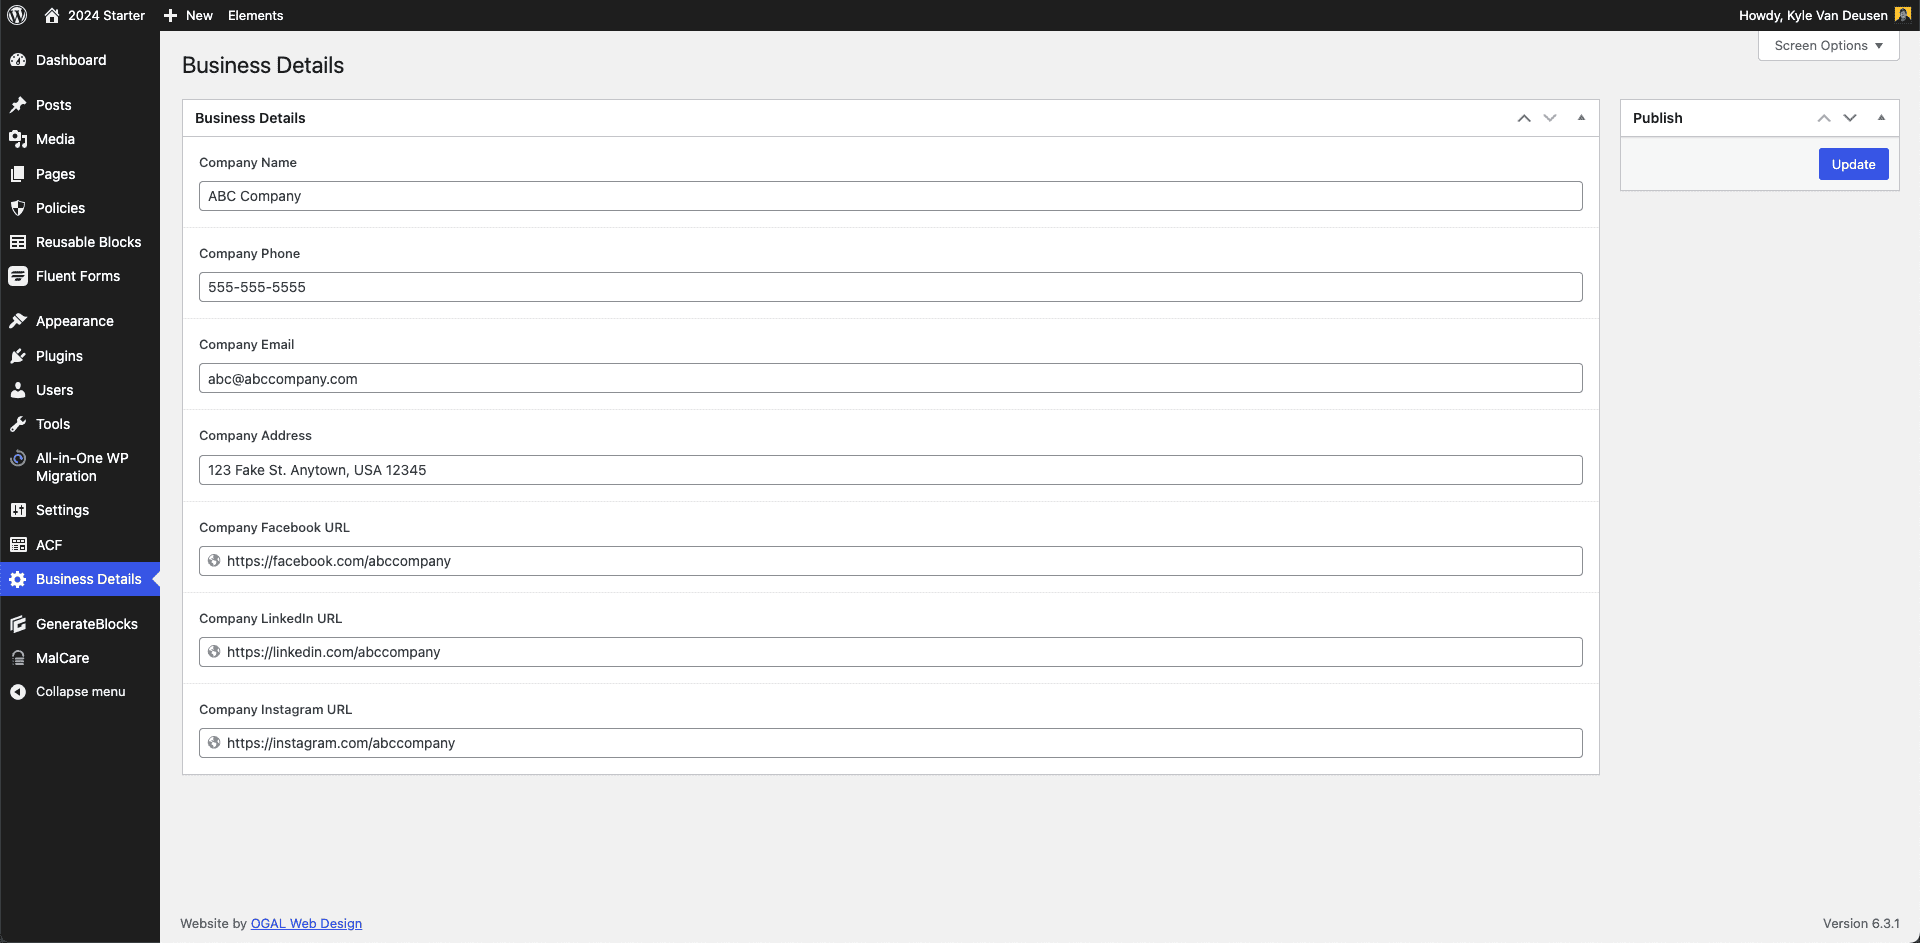
3. Named your options page (I called mine “Company Details”)

4. Save your Options Page

5. Under the ACF Menu, Click on Field Groups

6. Click on Add New

7. Give your field group a name (I called mine “Company Details” to match the Options Page)

8. Type “Company Name”

9. Click on Add Field

10. Type “Company Phone”

11. Click on Add Field

12. Type “Company Email”

You can, of course, continue adding fields (things like social links make for great options for your Options Page), but I think you get the idea and we’ll just move forward with these three basic fields.
13. Under the “Settings” Panel > “Show This Field Group If”, Select Options Page

14. Click on Company Details (or whatever your named your Options Page)

15. Click on Save Changes

16. Click on the New Menu Item for Your Options Page

17. Fill in your “Company Name”

18. Fill in Your Phone Number

19. Fill in Your Email Address

20. Save Your Changes

Referencing Your Options Fields on Pages, Posts and Templates
Now that you have all your options set up and ready to go, it’s time to deploy them across your website.
From here on out, instead of statically adding these details, you will reference the dynamic data from your Options Page.
Thanks to Taylor’s Template Tag system, this is simple!
Wherever you want to add data from your Options Page, use the following convention:
{{theme. followed by your field name, then }}.
For example, if I wanted to bring in my company name, the template tag would be: “{{themе.company_name}}” since the field name is “company_name”.
You can find your field names (and even click-to-copy them) from the ACF Field Groups screen:

On the backend, you’ll see the raw template tag, but when you view your content on the front end, it will be dynamically replaced by whatever value you’ve set in your options page.
The template tag system works in text, headings, links, buttons, and other text-based blocks (you can even use it inside the URL fields, making it a great use case for things like social links!):

Ideas for Utilizing ACF Options Pages
Options Pages are a great way to make your websites more scalable and maintainable… but if you’re new to Options Pages, you might not have yet considered all the ways they can be useful.
Let me share a few ideas with you….
Great Use Cases for Options Page Fields
Here are some fields you can add to pretty much every website:
- Name
- Phone Numbers (Main, Support, Sales, etc.)
- Email Addresses (Main, Support, Sales, etc.)
- Address (Physical, Mailing, etc.)
- Social Links (Facebook, Twitter, LinkedIn, Instagram, etc.)
- Tagline(s)
- Calls to Action (Newsletter Sign Up, Downloads, etc.)
Keep in mind, that this is just a partial list. Every website will present new use cases for taking advantage of Options Pages. What I’ve found handy is to ask myself two questions:
- Will this information be repeated on the website?
- Is there a chance this information could change in the future?
If the answer to both of those questions is a yes, then adding it to the Options Page is likely a great idea!
Build Options Pages into Your Starter Site
Although adding Options Pages isn’t difficult, who wants to repeat themselves with every new website?
One way to make this system even easier is to bake it into your starter site.
❓ Not sure what a Starter Site is? Check out the concept here.
You can go ahead and build out a basic Options Page inside your starter site and include basic fields that will likely be a part of any website build (like company name, phone number, address, email, etc.).
This way, the Options Page and some basic fields are already set up and ready to go with every new project you start — and you can just add to it as necessary.
Wrapping Up
Having the ability to use ACF Options Pages inside of my Generate Blocks builds is a huge leap forward for my builds.
I can’t tell you how much time I’ve wasted doing things the hard way… Enough that I’m tempted to go back and implement this system into all my website management clients’ sites.
As a bonus, Taylor’s Template Tag system actually unlocks more capabilities than just the Options Page (as if that wasn’t enough).
You can also bring in custom fields inline, query parameters, functions, user & author meta, and more.
You can watch the video below where I do a demonstration of some of the other features within the Template Tag system.

Kyle Van Deusen
After spending 15 years as a graphic designer and earning a business degree, I launched my agency, OGAL Web Design, in 2017. A year later, after finding the amazing community around WordPress, I co-found The Admin Bar, which has grown to become the #1 community for WordPress professionals. I'm a husband and proud father of three, and a resident of the Commonwealth of Virginia.


