I recently launched a new product called Agency Copilot — and as part of the delivery, I created a simple membership website.
Preferring to stay as lean as possible, I ended up combining just a few simple plugins and code snippets to pull the whole thing together.
The launch successfully handled onboarding over 780 users without a hitch — and I haven’t had to handle one support ticket regarding access.
So, in this video, I’m going to show you the key tools and code snippets I used to create a simple, lightweight membership site with GeneratePress & GenerateBlocks!
Visibility Control
In order to control showing and hiding content on the site to specific users or logged-in vs. logged-out, I used two free plugins from the WordPress repo.
Block Visibility
At this point, I’m installing Block Visibility on nearly every website I work on. This plugin makes it simple to show or hide blocks based on various conditions. It’s entirely free, and it’s really simple to use.
With this plugin, I could hide the premium content from any of my pages, posts, or templates. Not only can you choose from a wide variety of conditions, there is a preset builder that lets you combine conditions and reuse them across the website.
If Menu
Unfortunately, Block Visibility only works on blocks, so when it comes to the navigation menu — which also has items I’d like to show/hide based on whether the user is logged in or not — I had to take a different route
For this, I used the free plugin If Menu.
Although it doesn’t look like this plugin has been updated in a while, in my experience it works flawlessly.
Once you download it from the repo and install it, you have new controls when you’re editing your menu.
This allowed me to do things like remove the “buy now” and “log in” links to customers who have already logged in.
.logged-in Class
Until this project, I never realized that WordPress adds the class .logged-in to the body of a page when a user is logged in.
I didn’t take advantage of this much, but it did give me the ability to change the style of things for logged-in and logged-out users.
For example, I’m sharing the Proposal list for free — even to logged-out users. To draw attention to this, I created a pseudo-element that adds a “free” banner to the card.
This helps draw attention to prospects just browsing the website, but it’s unnecessary for people who have already purchased the product.
So, to show and hide this pseudo-element, I used a :not(.logged-in) rule to show the banner to only logged-out users
It’s crucial to understand that using the .logged-in class only hides or styles the content visually. If someone knows how to inspect a web page’s HTML (using browser developer tools, for example), they can still see the “hidden” content.
On the other hand, plugins like Block Visibility and If Menu don’t just hide the content — they prevent it from being loaded in the first place. That means even if someone tries to inspect the page’s HTML, they won’t find the restricted content. It’s a more secure method if you’re trying to keep certain information entirely away from non-logged-in users.
Login UX UI
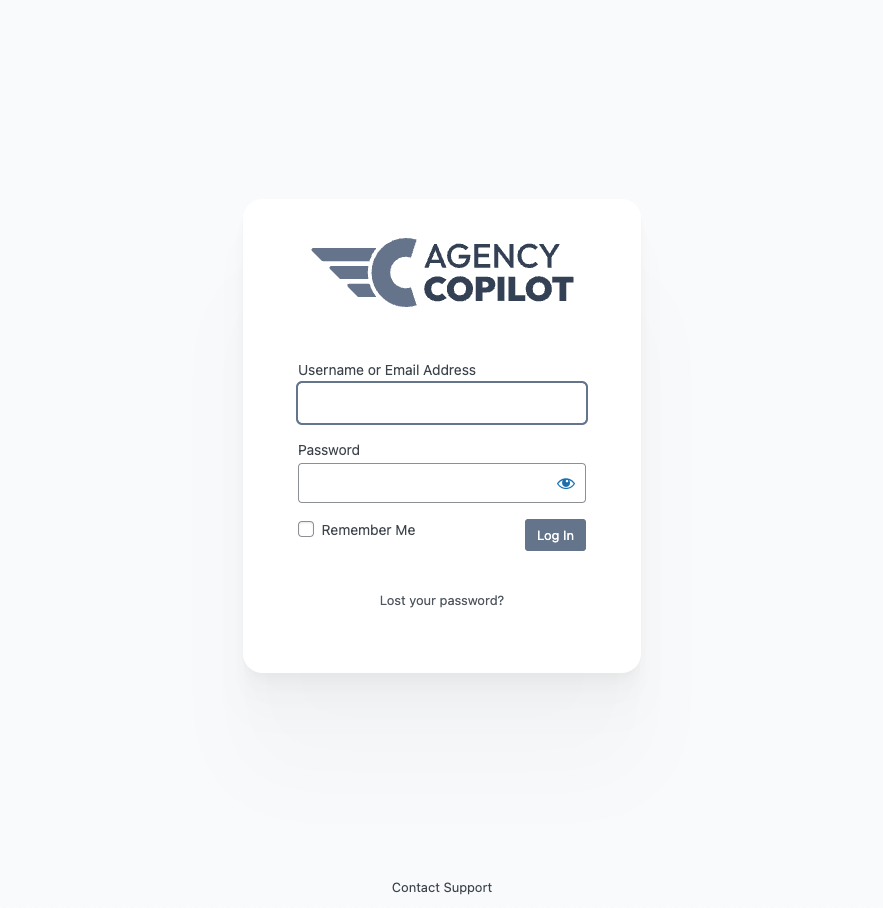
While those plugins helped solve access and visibility to items, I really didn’t like the look or experience of the default WordPress login… But thanks to ChatGPT and a few code snippets, I got that fixed up.
Login Page Design
The default WordPress login page isn’t anything to write home about… but it’s functional, and since all of my customers are WP power users, there was nothing wrong with using it.
But to give the product and site a bit of polish, I did add some design tweaks to the login page.

It’s not dramatic, but the subtle changes in branding, color, shadows, and softer edges give it a custom feel.
Here’s the PHP snippet I used to achieve this look:
function wpb_login_logo() { ?>
    <style type="text/css">


		/* CHANGE THESE COLORS TO MATCH YOUR BRAND */
		:root {
			--brand-color: #64748B;
			--brand-color-hover: #334155;
			--background-color: #f8fafc;
		}
		/* Body */
		body.login{
			background: var(--background-color);
			display: flex;
		}

		/* Logo */
        #login h1 a, .login h1 a {
			background-image: url(https://copilot.theadminbar.com/wp-content/uploads/2023/08/Agency-CoPilot.svg); /* Replace with your logo URL */
			height:80px; /* Adjust height if needed */
			width: 100%;
			max-width:263px; /* Adjust height if needed */
			background-size: contain;
			background-repeat: no-repeat;
		}

		/* Login wrapper */
		body.login div#login {
			padding: clamp(2rem, 0.714rem + 1.429vw, 3rem);
			margin-block: auto;
			margin-inline: auto;
			border-radius: 1.5em;
			box-shadow:
				0px 2.8px 2.2px rgba(0, 0, 0, 0.006),
				0px 6.7px 5.3px rgba(0, 0, 0, 0.008),
				0px 12.5px 10px rgba(0, 0, 0, 0.01),
				0px 22.3px 17.9px rgba(0, 0, 0, 0.012),
				0px 41.8px 33.4px rgba(0, 0, 0, 0.014),
				0px 100px 80px rgba(0, 0, 0, 0.02);
			background-color: white;
		}

		/* Login form */
		body.login div#login form {
			border: none;
			box-shadow: none;
			padding: 1rem 1rem 2rem;
		}


		/* Form inputs focus color */
		body.login input:focus{
			outline: 2px solid var(--brand-color);
			border: 0px ;
		}

		/* Submit button */
		body.login div#login #wp-submit {
			background-color: var(--brand-color);
			border: 0px;
		}

		/* Submit button on hover */
		body.login div#login #wp-submit:hover {
			background-color: var(--brand-color-hover);
		}


		/* "Lost your passworld" link hover color */
		body.login div#login p#nav a:hover, body.login div#login p#backtoblog a:hover{
			color: var(--brand-color-hover);
		}

		/* "Lost your password" positioning */
		body.login div#login p#nav, body.login div#login p#backtoblog{
			display: flex;
			justify-content: center;
			margin-top: .5rem;
		}

		body.login .message{
			border-left: 4px solid var(--brand-color-hover);
		}

			.custom-support-link {
	position: fixed;
	bottom: 12px;
	left: 50%;
	transform: translatex(-50%);
	color: var(--surface-70);
				text-decoration: none;
	}

		.custom-support-link:hover{
			color: var(--surface-90);
		}

		body.login div#backtoblog {
    display: none;
}


		.login #backtoblog a {
    display: none;
}


    </style>

<?php }
add_action( 'login_enqueue_scripts', 'wpb_login_logo' );
function wpb_login_logo_url() {
    return 'https://copilot.theadminbar.com'; /* Change to URL for when you click on logo */
}
add_filter( 'login_headerurl', 'wpb_login_logo_url' );
Login Behavior
As for the experience of logging, I’ve always hated that it dumps everyone in the backend of WordPress — even if they are just a subscriber.
To solve this, I added two snippets, which are also linked down in the description of this video…
Login Redirect
The first snippet I added, thanks to ChatGPT, was a redirect for when my customers log in. This script automatically redirects them to the /lists/ page, which was the most appropriate landing spot.
// Redirect users to /lists after login
function custom_login_redirect($redirect_to, $request, $user) {
    // If login is successful, redirect to the /lists page
    if (isset($user->roles) && is_array($user->roles)) {
        return home_url('/lists');  // Redirect to /lists
    }
    return $redirect_to;
}
add_filter('login_redirect', 'custom_login_redirect', 10, 3);
Disabling Backend Access
Even though customers wouldn’t be dumped into the back end, the admin bar across the top of the site invites them to.
The second snippet I added solved this by both removing the admin bar for all non-administrator user roles and redirects visitors to the home page if they try to visit any of the backend (wp-admin) URLs.
// Remove the admin bar for all users except administrators
function hide_admin_bar_from_non_admins() {
    if (current_user_can('administrator')) {
        return true;
    }
    return false;
}
add_filter('show_admin_bar', 'hide_admin_bar_from_non_admins');


// Redirect non-admin users if they try to access the backend
function redirect_non_admin_users() {
    if (is_admin() && !defined('DOING_AJAX') && !current_user_can('administrator')) {
        wp_redirect(home_url());
        exit;
    }
}
add_action('init', 'redirect_non_admin_users');
Registering Users
For my particular use case, I had two ways I needed to get users on the site.
First, there was a group of users who purchased during a presale period before the site was built. Then, there would be all the users that would need to purchase through the website after the product was launched.
Importing Users
To import all the presale customers, I used the WP All Import plugin, which flawlessly imported over 500 users.
Unfortunately, this is a paid product — but you can get lifetime access to both the import and export options that include the ability to import users for $299.
To carry out the export, I logged into my ThriveCart account and exported all my presale customers as a CSV.
To import, I uploaded that CSV file to the WP All Import interface, and it walked me through the entire process of mapping all the information, like name, email address, and user role.
Conveniently, WP All Import also gives you the ability to disable any user notifications during this process, which I took advantage of and was able to get all the users in place while the site was under development without anyone knowing.
Registering New Purchases
Since I’m not running the eCommerce side of things directly through the site (I’m using ThriveCart), I needed a way to connect my cart solution to create a WordPress user.
And although it’s not my favorite option, Zapier made this super simple.
I was able to use the prebuilt workflow to add a ThriveCart customer as a WordPress user.
If you’ve used Zapier before, this process was simple — just requiring me to map the checkout details to the user details in WordPress.
If you’re going to have under 100 of these zaps per month, then you could do this entirely free!
Conclusion
With the exception of importing my presale customers with the WP All Import plugin, everything else in this setup is entirely free (and, thankfully, I already had a license to WP All Import).
I haven’t done too many membership or restricted content type websites in the past — mostly due to them feeling a bit intimidating — but this process was actually a lot of fun.
Not only was it a lot easier than I thought it would be, I walked away with a ton of new tools in my toolbelt that I can take into future projects.
If you’re interested in checking out Agency Copilot for yourself, you can check out all the details at copilot.theadminbar.com.
If you got any value out of this video, hit the thumbs-up button and subscribe if you’d like to see more.
We’ll catch you next week!


